Getting Started
Before following this guide, you will need to make sure you have already created a live stream within the StreamShark portal. Our handy guide located here will show you all the steps to create a new live stream event.
Step 1 - Setting Up OBS
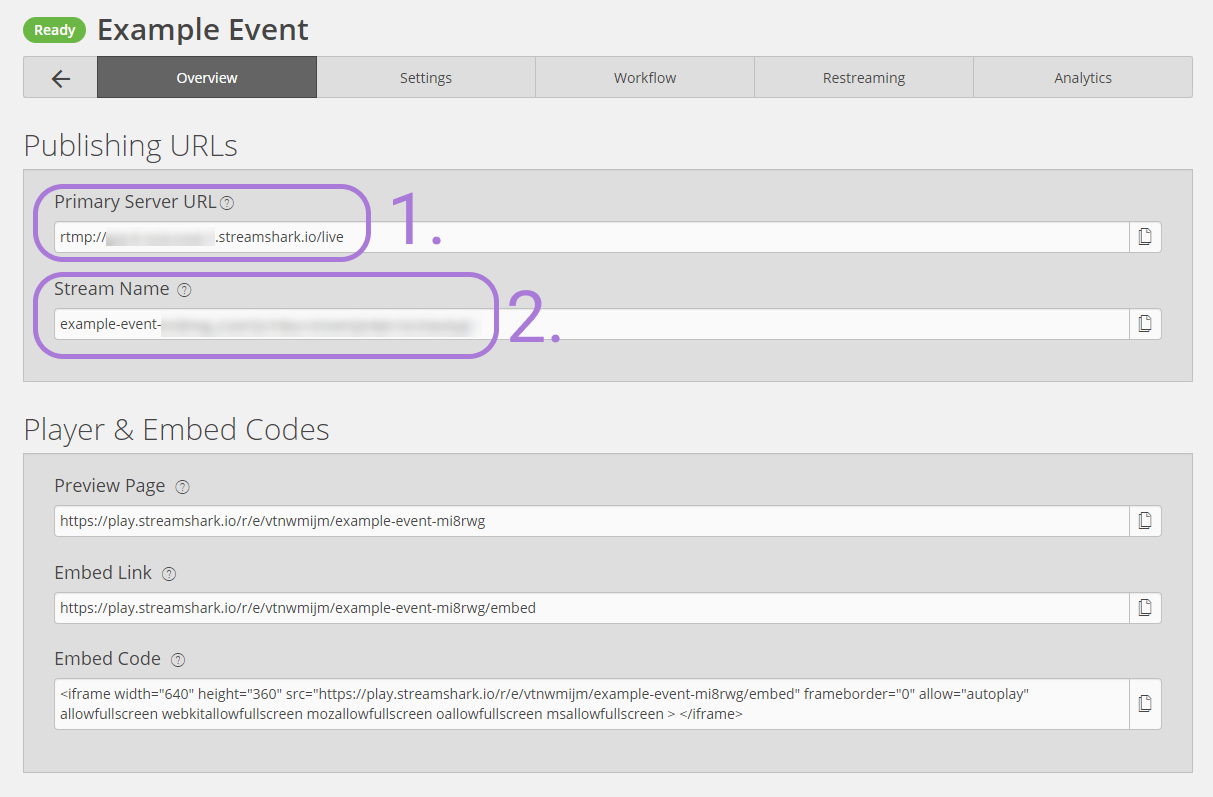
First we'll set up OBS to authenticate with StreamShark.
- In OBS open the settings menu.
- Select the 'Steam' tab.
- From the 'Steam Type' drop down, select 'Custom Streaming Server'.
- In the 'URL' field enter the 'Server URL' found in the StreamShark portal (as seen in the screenshot below, marked as 1)
- In the 'Stream key' field enter the 'Stream Name' found in the StreamShark portal (as seen in the screenshot below, marked as 2)

Step 2 - Setting Video & Audio Bitrate
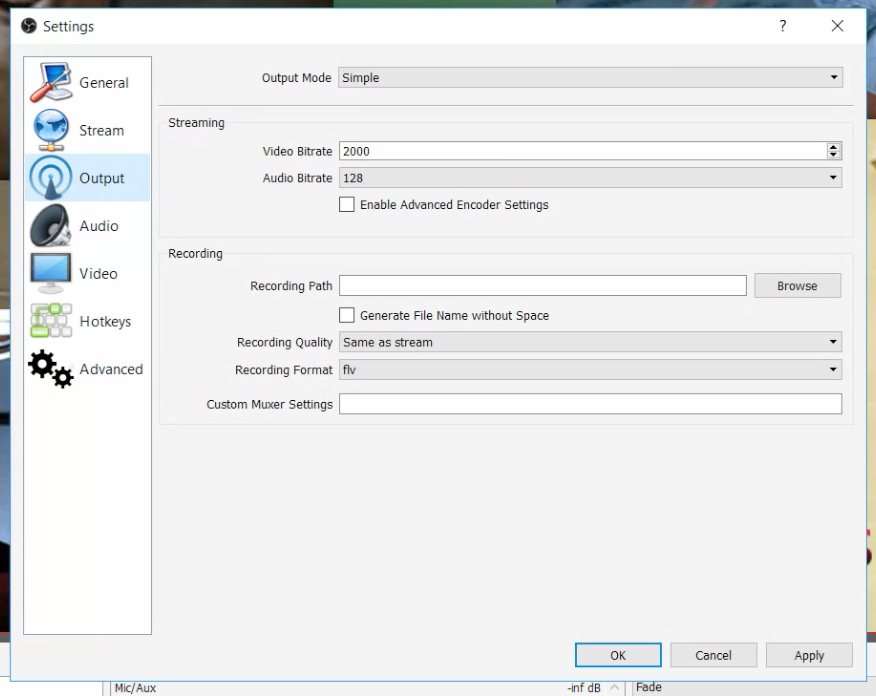
The next step in setting up OBS is to make sure the video & audio bitrate are setup correctly.
- In OBS, open the settings menu.
- Select the 'Output' tab.
- In the 'Video Bitrate' field, enter the bitrate which matches the transcode resolution you selected in StreamShark (Details below).
- In the 'Audio Bitrate' field, enter the bitrate which matches the transcode resolution you selected in StreamShark (Details below).
| Video Bitrate | Audio Bitrate | Resolution | |
| 2160P (4k) | 15,000Kbps | 128Kbps | 3840x2160 |
| 1440P (2k) | 8,000Kbps | 128Kbps | 2560x1440 |
| 1080P | 5,000Kbps | 128Kbps | 1920x1080 |
| 720P | 3,000Kbps | 128Kbps | 1280x720 |
| 480P | 1,000Kbps | 128Kbps | 854x480 |
| 360P | 600Kbps | 96Kbps | 640x360 |
| 240P | 300Kbps | 96Kbps | 426x240 |
Step 3 - Setting Up The Correct Resolution
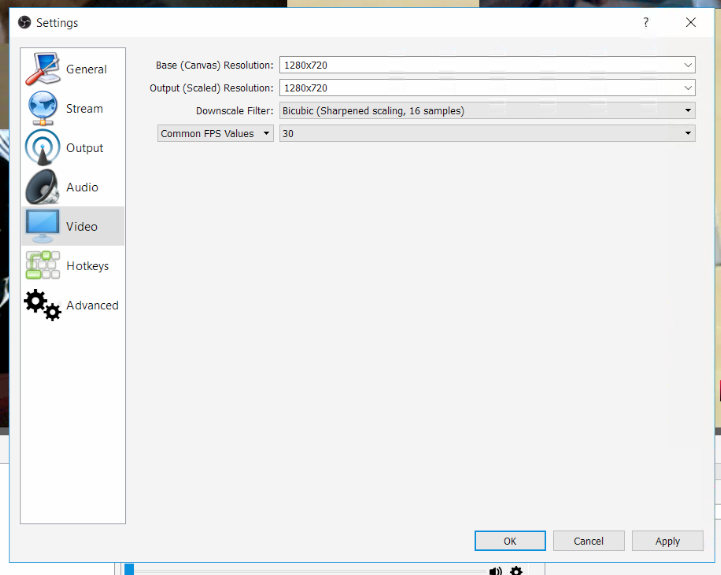
Finally we'll need to make sure that the resolution we set within the StreamShark portal, matches what we have set in OBS.
- In OBS open the settings menu.
- Select the 'Video' tab.
- In the 'Base (Canvas) Resolution' field, make sure it matches the transcode resolution set in the StreamShark portal (see table above for details).
- Make sure the 'Output (Scaled) Resolution', matches the 'Base (Canvas) Resolution'.
That's it, you're all set to start broadcasting!