Overview
The file bucket allows you to use 3rd party tools to bulk upload large volumes of video files.
Enable File Bucket
1) Log into the StreamShark portal.
2) Click 'video on demand' from the side menu, then click 'manage videos'.
3) Click 'add new'.
4) Select the 'file bucket' tab down the bottom of the screen.
5) Click 'enable file bucket' as seen below.
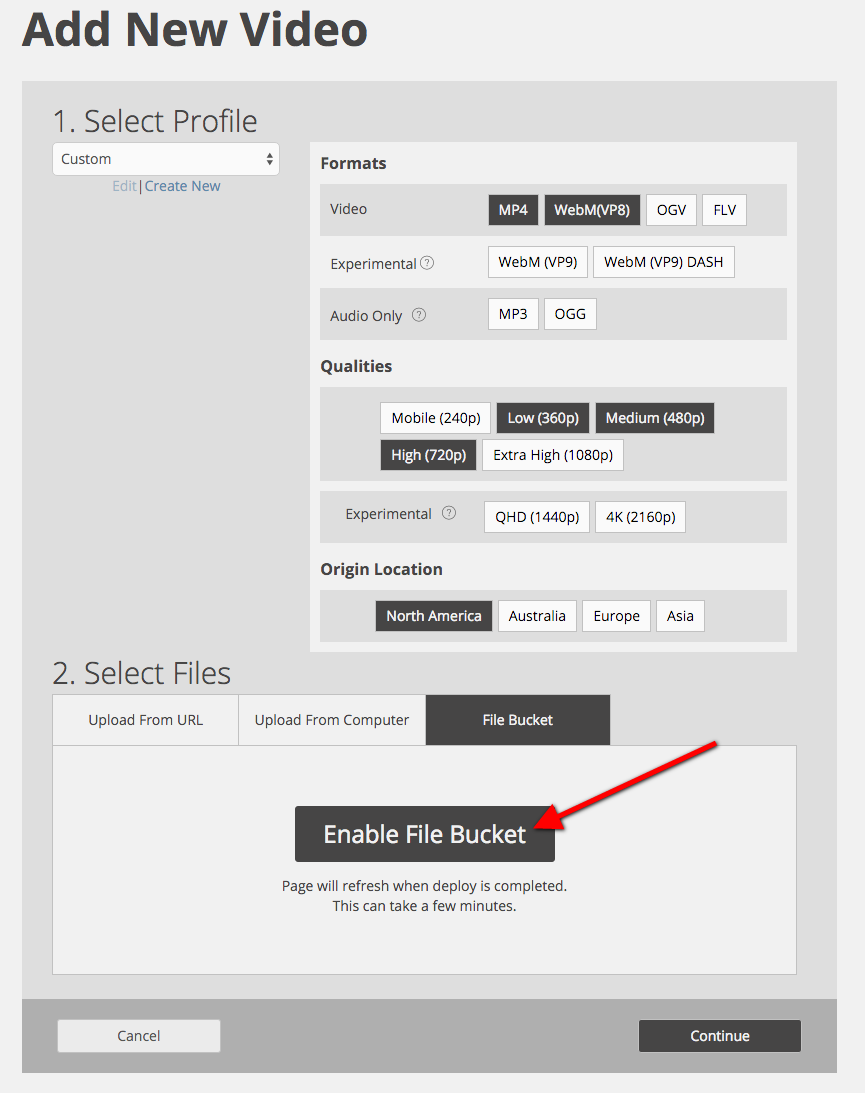
It may take a few minutes for the file bucket to deploy.
Your File Bucket Credentials
First you will need to generate a new key. This is done by clicking the 'generate key' button.
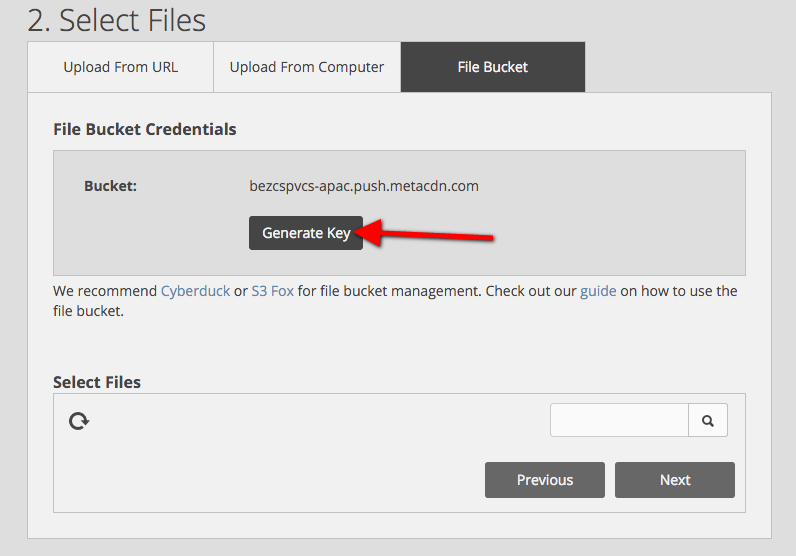
Once your key has been generated you will be presented with the following:
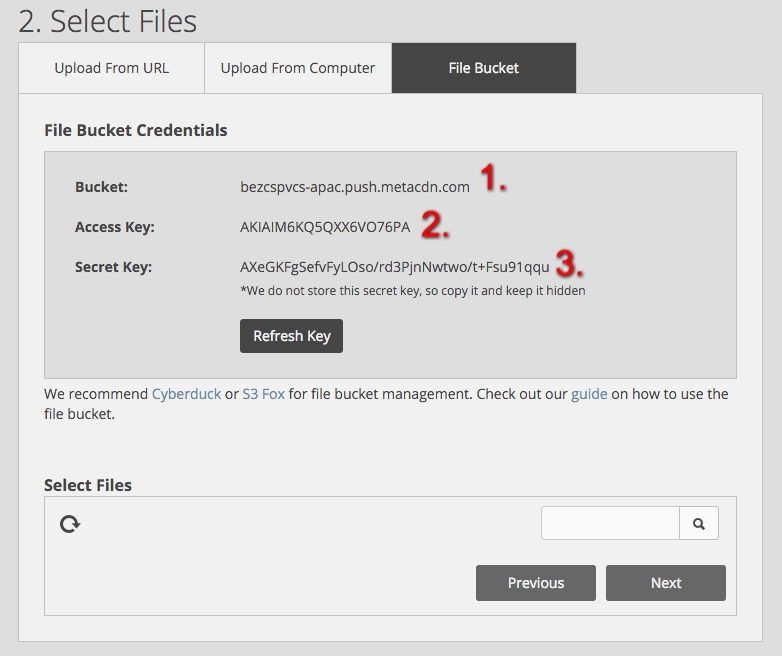
1) 'Bucket' name is the server URL used in your management tool of choice.
2) 'Access' key is the username.
3) 'Secret key' is the password. Please note that we don't store this key, and if you forget it you will need to click 'refresh key' to generate a new secret key AND access key.
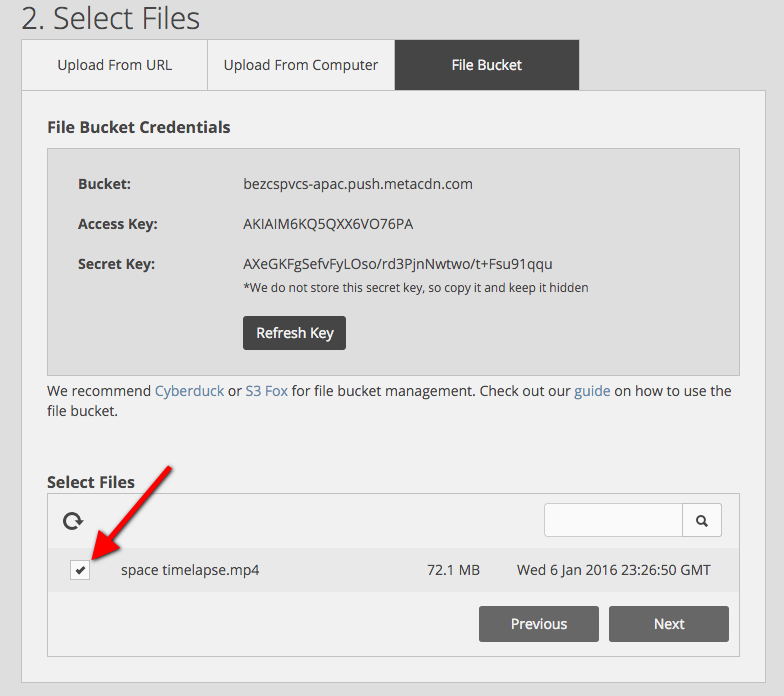
Selecting a File
Once you've uploaded video to the file bucket you will be able to see it from the 'select file' section.
Simply check the box next to the videos you want to use for your video on demand deployment.
Manage Files With CyberDuck
Cyberduck is available on Windows and Mac OS. Different versions will have slightly different setup screen:
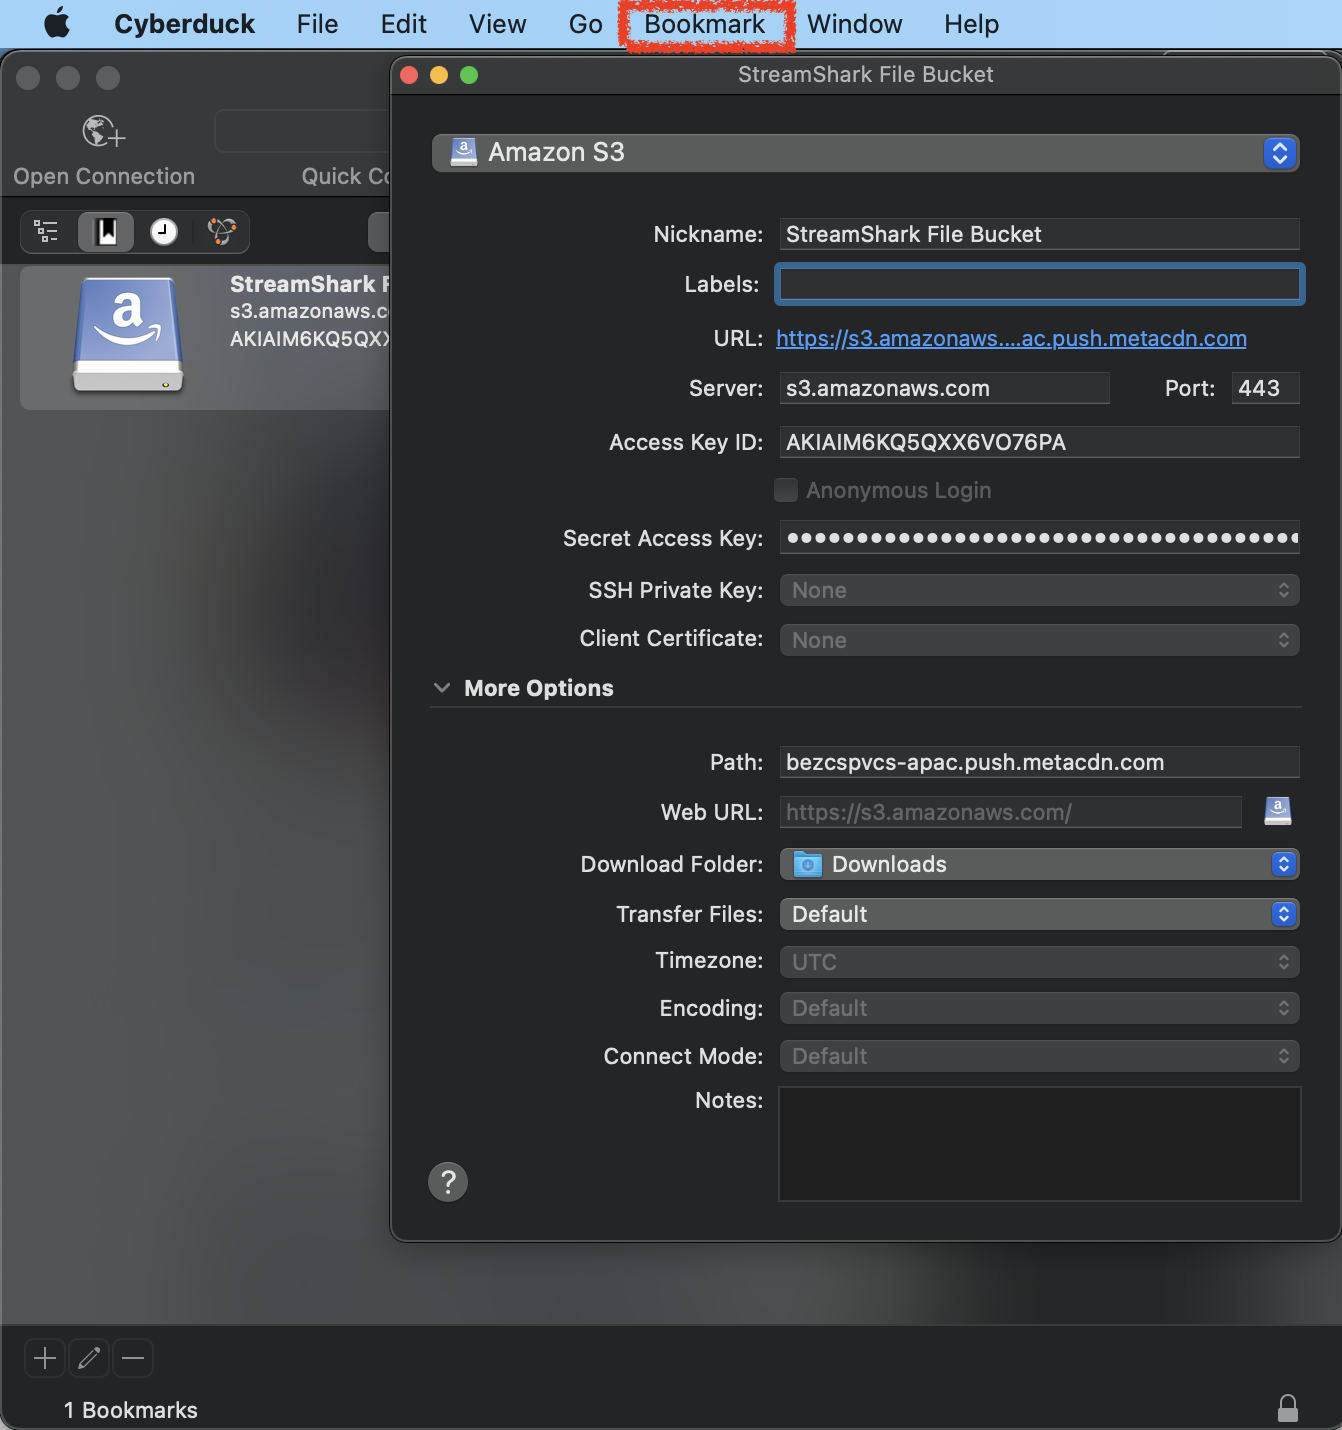
1. After Version 7.5.0
1) Click on "Bookmark" in the top menu bar, click "New Bookmark".
2) Choose "Amazon S3" from the dropdown list.
3) Give it a nickname for your convenience, i.e. "StreamShark File Bucket".
3) Enter "s3.amazonaws.com" for field Server, and 443 for field Port.
4) Copy & paste in your access key and secret key
5) Click "More options" to expand more fields, and enter the file bucket name in the Path field. (i.e. bezcspvcs-apac.push.metacdn.com).
6) Close the setup tab, a new bookmark should appear in your bookmark list, and connect to click.
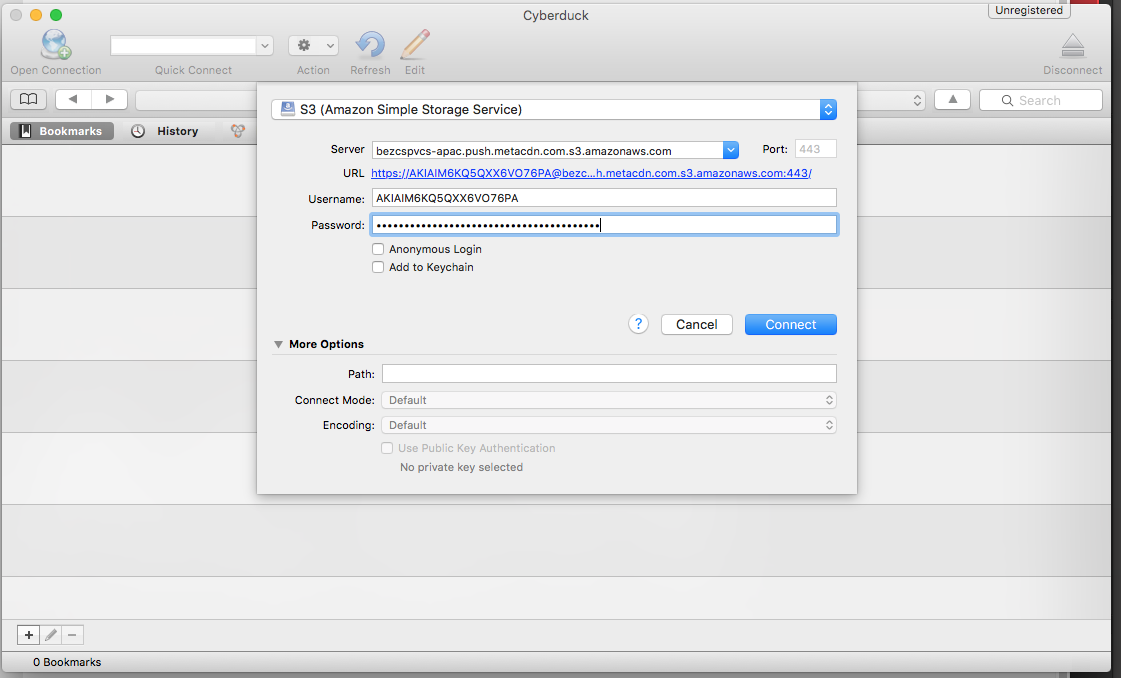
2. Before version 7.5.0:
1) Click "Open Connection"
2) Choose S3 (Amazon Simple Storage Service) from the drop down list.
3) Specify the server to be your bucket name, and append ".s3.amazonaws.com" e.g. "bkwsfud-na.push.metacdn.com.s3.amazonaws.com".
4) Copy & paste in your access key and secret key, and then click connect.
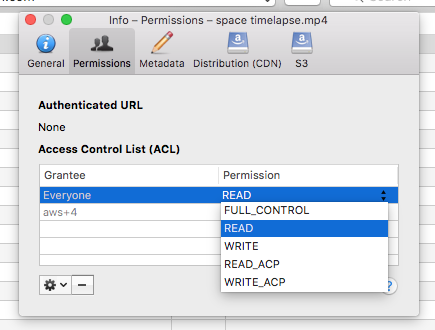
(Click image to enlarge)
Once you have uploaded a file, you will need to change the ACL (Access control list) to allow read access by everyone.
1) Right click on the file(s) and click info.
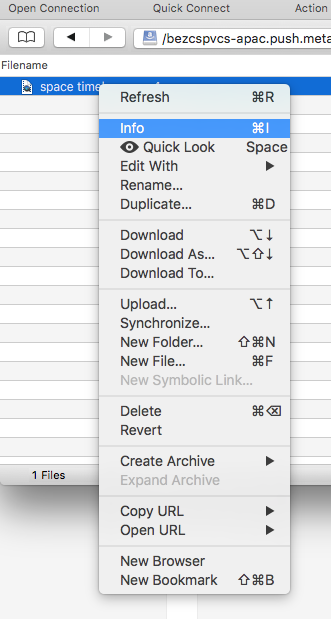
2) Select the permissions tab, then click the cog down the bottom, and click 'everyone'.
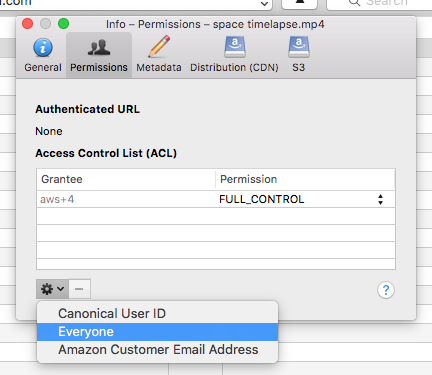
3) Then select the 'read' permission next to 'everyone'.